
3Cs stands for Controls, Camera, and Character: the holy trinity that largely determines how it feels to play your game. I already covered first-person cameras and I will cover characters in the future. This post is about controls.
But before we dig into controls, let’s think back to how the MDA framework speaks of the difference between developer and player perspectives.
It goes something like this:

A developer often starts from mechanics and implementation, and then explores aesthetics through the course of the project. Sometimes as a consequence of the resulting dynamics; sometimes as the product of focused work, like art direction or narrative design.
The way I like to look at this is in 3C terms is based on a similar reasoning.
- As a developer, you need to build the mechanics of player interaction first; the Controls.
- As a player, you’ll see the aesthetics of the 3Cs first; the Character.
- The Camera gets caught in the middle, as an expression of dynamics.
In other words, I look at controls something like this:

This may seem a bit unintuitive, since controls are definitely what the player will encounter first. But the reason for this is that the controls shouldn’t be something the player pays attention to. Like a movie soundtrack, they should make everything feel just right by never getting in the way.
Unfortunately, as with everything in game development, there’s no consensus on how to achieve this. But I’ll show you some pseudocode to at least point you in a direction, including some best practice tips and lessons learned from having done this a number of times through the years.
Using Established Standards
One way we can make the control process smoother is by using the tried and true. Left stick or WASD to move; right stick or mouse to look around. Using the Escape key to get to the main menu.
This is all well and good, but it sometimes leads to design decisions that may not be beneficial for your game, since paradigms in controls sometimes imply features and your choice of paradigm will suddenly dictate your game design.
Before Halo came along and restricted you to just two weapons, pretty much all first-person shooters used the numeric keys–ever since Doom–to let you pick your gun. This was one of those “established standards” that has since been disrupted simply because there are no numeric keys on a gamepad. This change has also led to other ways of playing first-person shooters with more limited inventories.
If you decide to rely too heavily on established standards you may inadvertently add features and dynamics from other games into your own game, risking that your game loses its identity. But as you also know about gamers, there will be opponents against every single change to said standard as well. So this really is one of those things you can’t win.
Using a Tutorial
Another common way to try to smooth a player into a game experience is to tutorialise its key features. I’m not personally a fan of tutorials, but mostly because we tend to tutorialise the most trivial of our features and sometimes fall into the trap of thinking that everything must be tutorialised.
Think back to Super Mario Bros‘ iconic first level. You’re sitting on the floor in front of your TV and you have two buttons, one of which will make Mario jump. No tutorial. No obtuse full-screen modal “Press A to jump and avoid the goomba” message. If you don’t jump, the goomba kills you. The game trusts you to figure this out on your own–and all players did. It’s strange to me that we don’t trust our players to figure things out for themselves.

Using a tutorial to introduce key features that are unique to a game can sometimes be relevant, or to make sure that a particularly important synergy doesn’t get lost. In some cases, as with Portal, you can argue that the whole game is a tutorial. But I’m personally hoping that I never have to play another tutorial where I need to learn things that I could learn on my own given enough time. It’s simply not a good use of my game time.
Input
Controls can be roughly divided into two things: input and action. If input is the activity of the player as conveyed by the hardware, action can be seen as the game simulation’s understanding of said input. Activity conveyed by the player’s in-game avatar.
Note that none of this is all that specific to first-person games, making the headline a bit misleading. But first-person is still the common thread that runs through these posts.
About Platform
A game designer I once worked with always kept a controller on their desk. This designer would pick up the controller whenever confronted with a design problem and imagine playing the game with some version of whatever solution was being discussed. The stated idea was to “think with a controller.” Surprisingly often, this would provide some kind of hint about the validity of the solution.
From an input standpoint, input and platform is basically the same. PlayStation or Xbox matters little, for example–they are both gamepad platforms–while a touch interface and a gamepad will differ greatly both in execution and game feel. Whichever target platform you have, make sure to use it and to think with it all the time: never make decisions based only on how things feel in your development environment.
Command Pattern
It’s handy to make you aware of the Command pattern at this point, if you weren’t already. It’s a way to decouple commands from actions that demonstrates a few neat features we can make use of with input.
Basically, pressing a button executes a command, and the command in turn is what manipulates the game state. For example, a MoveCommand would move you in some direction and a JumpCommand would make you jump.
- Queuing: one thing we can do is send all commands that come in to a queue and then execute actions from the commands in that queue. This can be really handy for things like networked input traffic, or to make sure that input isn’t dropped because of lag spikes or other reasons. But it can also make whole genres, like turn-based strategy games.
- Undoing/Redoing: if you can queue commands, you can also step back and forth through the queue. The laziest way to make undo/redo functionality is to store executed commands from the queue in a stack and then pop things back into the queue from that stack. It’s an undo/redo that practically writes itself, if you have a stack and a queue you can use (like C# has through .NET, or Unreal Engine’s TArray).
- Recording: if you want to get really fancy, you can serialize your commands, store them in some way, and use the stored input to replay the game wholesale. Not only is this put to good use in many deterministic games, like the Halo games, it’s also the neat thing that gives you killcams in Call of Duty, for example. It requires that you make your system flexible enough to execute commands no matter where they come from.
Where you put this pattern will depend on your game’s architecture, but having a single place in your code that’s responsible for input reception is a good practice. You’ll hopefully see why in a bit.
Binary
Computer hardware speaks in bits. Zeroes and ones. For input, this means a button is either pressed or it’s not. Some game engines will send you the raw input as a 1 or 0. Other game engines will pass this along as a boolean true or false.
Using this kind of input as-is often leads to nested if-statements inside game loops. This is known as polling, where you are effectively asking a button if it’s pressed every frame, and doing things if it is; doing nothing if it’s not. Polling is generally bad. If nothing else then for the fact that you’re executing code merely to have it return early when the button isn’t pressed. Kind of like a kid constantly asking, “are we there yet?”
If you do this enough, it’ll cost more battery on your device than need be. Not a problem for beefy gaming PCs plugged into a nuclear-powered wall outlet, but quite relevant for mobile games and handhelds. But more than that, polling makes for messy code.
With binary information we can keep track of two things: when the button is pressed and when it is released. This requires that we know if it was pressed last frame so that we can check if there’s a difference in this frame. If last frame was 1, and it’s now 0, the player has let go of the input.
Se we need some way to keep track of the button’s current state, for example using an enum.
“Idle” is any polled frame where the button’s state didn’t change.
enum EInputState
{
    Idle,
    Pressed,
    Released
}
Duration
Sometimes it’s relevant to know for how long a button has been pressed. Either continuously, or on release. This is usually stored as seconds, where you accumulate delta time and add it to the button’s hold duration each frame.
This can be used for many different purposes, and may be relevant to differentiate from press and release. (Though frankly, you rarely need to know anything beyond fHoldDuration if you want to make use of it.)
enum EInputState : public byte
{
    Idle,
    Pressed,
    Released,
    Held
}
struct FInputData
{
EInputState State;
float fHoldDuration;
}Threshold
Probably the most common use of fHoldDuration. Set some kind of threshold value that allows the input to trigger–the effect is that you need to hold the key down for the set duration. This can either trigger regardless of the key’s state, or it can trigger on release.
This threshold can also be used to have the input taper off, like a Super Mario 64 jump. In such a case, once fHoldDuration reaches fHoldThreshold, the input is flipped to Idle and you must release the button (and maybe land on the ground) before the input can be used again.
struct FThresholdInputData : public FInputData
{
    bool bTriggerOnRelease;
    float fHoldThreshold;

    bool Evaluate(FInputData Input)
    {
        if(Input.fHoldDuration >= fHoldThreshold)
        {
            if(bTriggerOnRelease && Input.State != EInputState::Released)
            {
                return false;
            }

            return true;
        }

        return false;
    }
}
Repetition
Another way to use fHoldThreshold is to allow multiple inputs. We’ll get back to this again when we talk about actions, because sometimes you may want to use multiple actions as well. Just remember that these aren’t necessarily the same thing.
How you do this is that you provide a value for how many times the input is allowed, and then you provide ways to reset this check.
struct FRepetitionInputData : public FThresholdInputData
{
    int iRepetitionsAllowed;

    bool Evaluate(FInputData Input)
    {
        if(iCurrentRepetitions < iRepetitionsAllowed && Input.fHoldDuration < fHoldThreshold)
        {
            return Super::Evaluate(Input);
        }

        return false;
    }

    void Execute()
    {
        iCurrentRepetitions++;
    }

    void Reset()
    {
        iCurrentRepetitions = 0;
    }

private:
    int iCurrentRepetitions;
}
Toggle
It’s probably safe to say that the default style of interaction in games is to press a button and have something happen. A toggle is another way of doing things. Press a button to trigger an action that remains active, then press the same button again to disable it.
This will often be for specific types of input, like a crouching toggle or turning your night vision goggles on and off, but another reason to have good support for toggling is with customisation in mind. Some players prefer to use toggles instead of held input. Allowing players to remap hold interactions to toggle interactions is therefore a great thing.
struct FToggleInputData : public FInputData
{
private:
    bool bIsActive;

public:
    bool Evaluate(FInputData Input)
    {
        if(Input.State != EInputState::Started)
            return bIsActive;

        bIsActive = !bIsActive;
        return bIsActive;
    }

    void Execute()
    {
        if(bIsActive)
            // Do stuff
    }
}
Axis
An input axis is two inputs that together equate to a value between -1 and 1. If you are making a leanout feature, for example, lean left could be -1, generated by holding the Q key, and lean right could be 1 and the E key.
It’s usually as simple as evaluating one input as negative and another as positive and using the result of both of them added together to determine the axis. This is why you will stand still in many games when you hold both forward and backward at the same time. (If you have tried this, I can assure you that yes, you are still a normal person.)
Dual-Axis
Combining two axes gives you a 2D vector. Up and to the right (1,1), down to the right (-1,1), etc. This is how you often map moving and looking in a first-person game and really is just as straightforward as it sounds: combine two axes together.
One important thing to note is that dual-axis input needs to be normalized, since the length of your vector will otherwise make you move faster diagonally. This is for simple mathematical reasons: (1,0) + (0,1) has a higher magnitude than (1,0). Most engines will do this for you, but you shouldn’t take it for granted–make sure to test so that you don’t move faster diagonally.
Some devices may actually return values higher than their analogue thresholds due to this dual-axis addition, which you may have to take into account.
Analogue
Whether a single axis, like a gamepad trigger, or a dual axis, like a gamepad stick, an analogue input returns a value between 0 and 1, or between -1 and 1 if it’s an axis. So if you move a stick to the half-point between its neutral center and the rightmost point, it will return (0.5 , 0), for example.
The number used “behind the scenes” is normally something else, based on the hardware. An analogue trigger on the Xbox 360 uses an unsigned byte, for example, giving you a number between 0 and 255. An analogue stick, on the other hand, uses two short, returning a number between -32768 and 32767 for each axis, where (0,0) is the neutral idle position of the stick. But what you normally do is simply divide the returned number by the maximum number on that axis to get a normalized floating point number to work with. (You should see this pattern by now: 0s, 1s, and 0 to 1s.)
Absolute and Delta
Another thing that makes a difference is whether you are using the absolute value of the input or the change between two frames–the delta–of the input.
Compare the interaction you have with a selection wheel to how you look around in first-person. The interaction wheel will respond to where you are pointing your stick, using the absolute direction of your input, while looking around will rotate your view based on how much input you apply in the moment. The first is absolute, the second uses delta.
Pointer
With some devices, you want to track the screen space location of a pointer and use that as input. It can be the mouse pointer, a finger’s location on a touch screen, or something like it. This is different in that it’s not delta but neither is it just a 1 or 0. It may also be resolution-dependent.
Drift Deadzones
Most analogue inputs will suffer a bit of drift. Both over time, with increased wear, but it’s also common for gamepads to suffer some drift straight from the factory.
This drift will take the form of the input never resetting completely, but “drifting” slightly near zero. Usually by a small fraction. To handle this, you will usually filter your analogue inputs to ignore the lowest 5-15% of input so that this drift is never picked up as input. You can test this in some games by doing just a tiny tiny stick move, and observing how your game doesn’t react at all until it hits the right amount of input.
You may also have noticed the effect of this drift, if you have left an old controller on the floor and observed that your first-person game keeps looking right slowly. Then the drift is higher than the deadzone threshold, and you may have to tweak the deadzone (or get a new, less rebellious, controller).
Bias Zones
Some inputs are more important or statistically more common than other inputs. These you can provide with some more bias, weighting them so that input near the biased directions is treated the exact same. If your bias is 10 degrees for example, anything within 10 degrees of said direction is handled as that exact direction. This can be a good way to avoid tiny offsets with things like cardinal directions. I.e., to move north you shouldn’t have to find the exactly right analogue angle on the stick–it should be enough to move roughly north.
Acceleration
Analogue thumbsticks don’t have quite the range of motion as optical computer mice, and if you ask anyone from the PC Master Race, they also lack precision. One way games sometimes try to mitigate this is by using discrete aim acceleration. It’s an increase in the analogue input over time or distance to let you turn faster and provide you with an approximation of the movement spectrum of a mouse. I.e., it lets you turn on a dime similarly to how you do with a mouse.
You can apply this for either axis, or both axes, but the most common way to use it is to use it for horizontal aiming (planar alignment and so on). A quick way to try this is to add an easing function, like EaseInExponential, to the input, based on the stick’s range of motion. You can also apply a multiplier using your game engine’s curve variable of choice.
Gestures
With touch interfaces, and some other types of interfaces, you may want to translate certain combinations of input into different inputs. Think of the pinch gesture, for example, which is often used to zoom out. It’s technically just two “drag” inputs with separate fingers, but the right relative velocities turns it into a different input.
There are also multi-stage gesture recognition alternatives, like point-cloud recognizers, which allow you to recognize predefined shapes like letters or maybe magical patterns while drawing freeform shapes.

Customization
On the input level, customization is a big deal. Many gamers remap controls to fit their preferred play style. Some games allow the running of automated macros to perform specialized actions, or to automate tedious ones.
But you can also provide other types of customization. Game speed. How much damage enemies deal, or how much they can take. Ways to display or hide specific elements from the in-game HUD or map.
Basically, anything that goes into the processing end of input can usually be customized without it making any difference for the resulting actions.

Input
That’s it! Your platform’s physical interface tells you what state an input is in, you process it, and there’s your input. There are, as usual, many more ways to proces input than the ones listed here, but these are the most common.

Actions
The input has happened and we can now plug something into it. Most actions will trigger and then do their thing without any requirements, but some actions will require input data (like delta mouse movement or a pointer screen position), so we sometimes need one-way communication from input to action.
This gives us two types of actions: with or without parameters.
class Action
{
public:
    virtual void Execute() = 0;
};
class ParameterAction
{
public:
virtual void Execute(void* pData) = 0;
};But before we think this is it and start running, there’s something we must consider: will your action be generic or specific?
Generic actions can be performed by any avatar in the game world that happens to fit some description. A MoveAction will likely work the same for player characters and enemy characters, for example, by applying a directional vector.
Specific actions can only be performed by something that fits exactly, and would require you to make EnemyMoveAction and PlayerMoveAction separately. This is quite common, since the player character will often be governed by different rules than the enemies. In a game like Dark Souls, even though the systems for playing animations and attacking may be the same, enemies have no standard way to dodge roll or circle the player. Those behaviors are more player-specific.
Picture a simple implementation for a pickup system, as an illustration. You shoot a ray from the player’s camera, filtered to a specific physics channel, and collect objects that are hit in the current frame. This would be a specific action, since enemies don’t have cameras.
If you’d instead use an overlap sphere to collect objects and filter them using an angular check, it’s suddenly a generic action that could work the same for both players and enemies. For systemic games, it’s often desireable to make actions as generic as possible. Why? Well, firstly, it means you waste less time. But secondly, and more importantly, it also means you leave room for all characters in the simulation to behave like the player does, reinforcing the rules of the game world.
What this also means is that you shouldn’t tie input directly to actions. There should be something routing your inputs to where it needs to go, since you’ve otherwise limited your actions to only be useful for the player. But fortunately, as you’ve already seen under the hood of all that processing and other stuff going on, input is pretty straightforward.
Data
One thing we need to consider when we transform input into action is how to manage our data. Move speed, jump height, blend curves; lots of numbers go into actions, and we don’t want to have to chase them across objects in our project. We also want to be able to do both sweeping changes, like “double all damage,” and minute tweaks, like “increase player jump height by 5%.”
By separating data from logic, you make it a lot easier to tweak and rebalance your game in the future, and you can also decouple the data to the extent that you can work with just the data without having to compile or rewrite code. This is a paradigm in software development that may be known as data-driven or even data-oriented, but it’s out of scope for this article.
- Baseline numbers are the foundation. Like the concept of Damage. You can go back and tweak the baseline when you want to make broad changes that affect the whole game, for difficulty modes for example.
- Attributes are entity-specific local tweaks. Like a character’s Strength attribute, that is added to Damage. You tweak attributes to make a specific entity behave differently.
- Modifiers inlude everything that would change the data in any way. When you hit something in the head to deal extra damage, for example. You add, remove, and change modifiers to differentiate game events and/or entities even further.
- Functions bring all of it together, but are also data in themselves, and should usually be the only part of the data chain that the game simulation cares about. In the simplest possible form, Baseline + Attributes + Modifiers = Value would be a function, and Value would then be used by the relevant action.
Metrics
When you have all the data, you also get metrics. Metrics are numbers or ranges of allowed numbers that provide the game with context. How far you can jump, how low you crouch, how fast you run in a certain amount of time, etc.
One thing you need to do is to not get too hung up at this point on what is realistic, because this has very little bearing on what feels nice to play.
As quoted from Leveldesignbook.com, “In Doom, the player (‘Doomguy’) is 32 pixels wide, which translates to 1 meter wide. The shotgun is 63 pixels long, which is almost 2 meters (6 ft. 5 in.) long. Oh, and Doomguy runs at 30 units per frame, which is 40-50 MPH depending on which hotly debated scaling system you use. Either way, Doom scale doesn’t make any sense, but it feels nice to play anyway.”
This information is used to define your level design and art production, meaning that once you have settled on something it will be extremely expensive to change. No matter if that expense is in developer time for a solo developer, or a treasure chest of content production dollars.
Triggering
With data and metrics in mind, not to mention the game simulation itself (including the camera), you can now finally verify that the right action is triggered under the right circumstances.
A melee attack action could trigger differently if you are standing behind your enemy or in front of them. A single-hit assassination perhaps, or a pat on the shoulder followed by a “boo.”
Collecting context about the game world’s state is a whole other system’s responsibility, but this is the point where your controls care about it. If ledge-grabbing can only trigger near a ledge, now is the time to check if there’s a ledge nearby.
There are also some other considerations you can make.
Cooldown
So, I don’t like cooldowns. But there’s nothing stopping you from using them and this would be where you check them. Input received correctly, now check if the action’s cooldown has run its course. If it has, trigger the action.
But before you do, consider the alternatives.
Close Enough
Sometimes pixel precision or simulation realism is not what we want. We may even want to cheat a little for the player’s benefit. In platformers, this is often referred to as Coyote Time, “after the animation style of Wile E. Coyote who would frequently float in air for a few seconds after running off of a cliff.” It’s when you have actually overstepped the edge of a platform, but the jump action is still allowed to trigger a few frames after the fact. We understand that the player wanted to jump, and we let them.
This can apply the same to first-person shooters, allowing a miss that was only off by a small margin to connect anyway. Many oldschool first-person shooters, before mouse look, would completely disregard the vertical distance and allow shots to hit regardless.
But a bigger deal in first-person is that it’s hard (actually impossible, if it’s not in VR) to accurately judge distance. You also don’t have any body awareness, unlike in real life, which means that you may definitely press jump a few frames after overstepping a platform, because you never felt how your feet started running midair.
The two standard close enough features you should consider having, if you have jumping, is the Coyote Time, and also ledge-grabbing if you are close to an edge.
Aim Assist
Soft aim assist is quite common, and if you want to read more about one way to do it you should read The Astronauts’ blog post on aim assist. It’s an excellent read. It’s really just the aiming equivalent to Coyote Time, alowing a shot to hit even if it was actually slightly off.
Sometimes, this is also a contextual thing. If you use an arc to identify targets hit by your shotgun, for example, and you center that arc at the player’s feet, anything right in front of the player will have a big chance of simply not being inside that arc. In such cases, you can let the shot hit anyway, simply because that’s what you want to happen as a player when you strafe around a corner and your shotgun feeels like it’s basically shoved down your enemy’s throat.
Auto-Aim
For some games, it may feel like soft aim assist is not enough. You want the aim to snap right to where the target deseves to get lead poisoning. This may be a lock-on, like how Metroid Prime did things on the GameCube (and presumably in the Switch remake I haven’t played), so you have to hold a key to activate it. Or it can be the left-right trigger combo of Call of Duty 4: Modern Warfare, where your downsight aiming snaps to the target and you can then press the right trigger to blow them away.
Auto-aim is controversial, but only really among PC gamers. For some games, it can be the feature that lets players focus on something other than pixel precision aiming. Like how Metroid Prime provides an impression of the projectile dodging you did in its side-scrolling precursors.
Direct Action
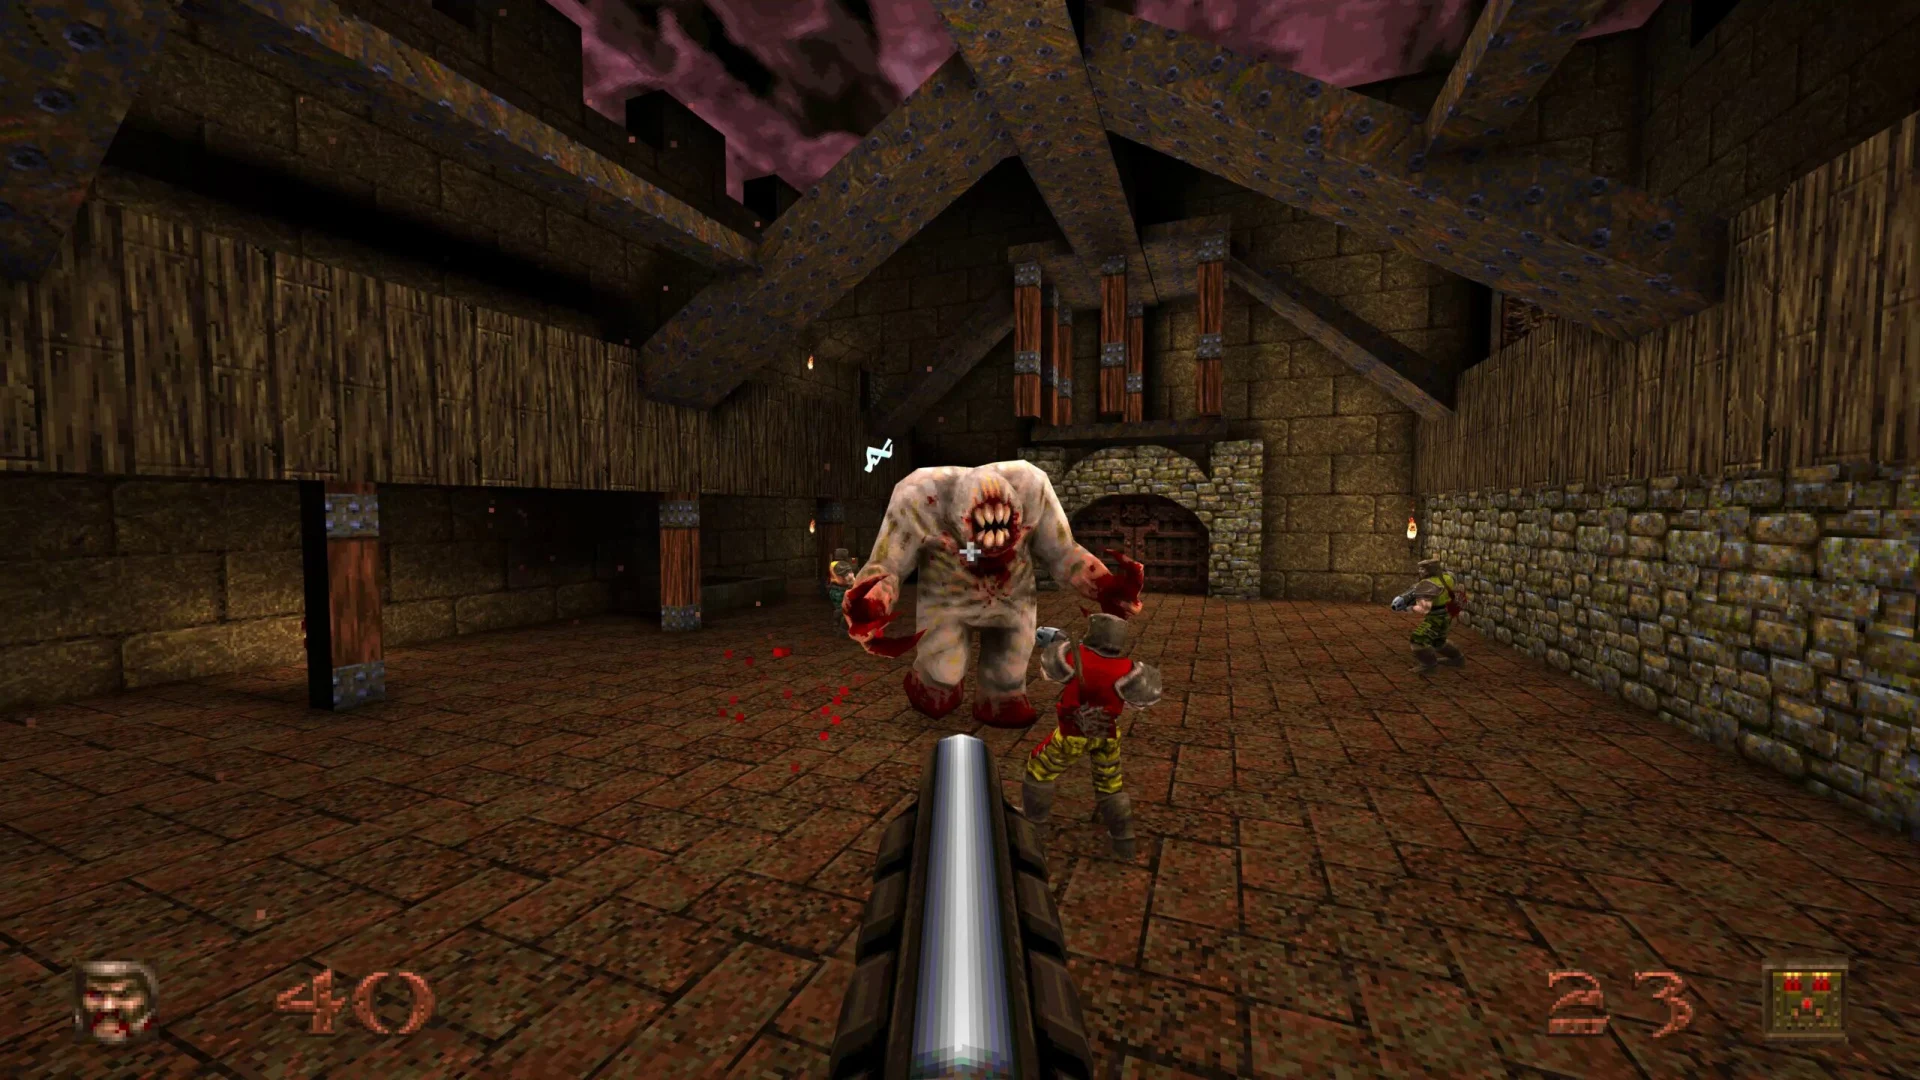
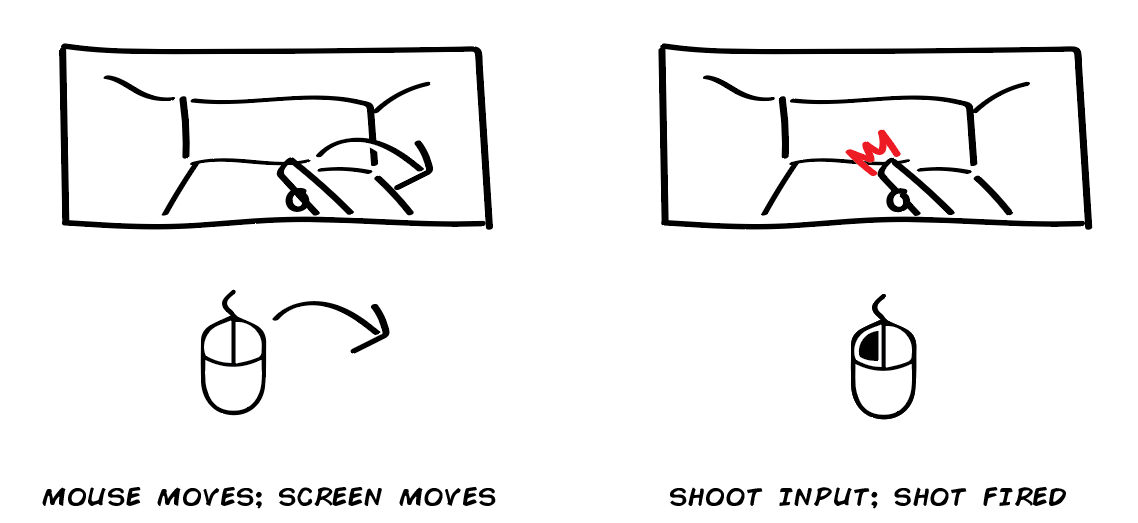
A direct action is when input directly executes an action. The most typical example is shooting in a first-person shooter, but you’ll find that many features in first-person shooters are built on similar grounds.
When you throw a punch in melee-oriented first-person shooters, it’s not uncommon for the thrown punch to begin with the fist at the point of impact and then play an animation as the hand goes back to the original stance. In other words, no telegraphing or even throwing the punch occurs at all, that’s implied. Just like you don’t have to see the finger press the gun’s trigger before the shot is discharged.
The reason for this is that you don’t want the game to feel less responsive. You don’t want the animation content to take over from other actions that are direct.
Intent-Based Action
Sometimes a game doesn’t tell you exactly what will happen when you try to perform a certain action, but will instead tell you roughly what will happen.
Think of all the survival action games and how your intent is to use the thing in your hands, but what actually happens depends on if that thing is an axe for wood-cutting, a shovel for digging, or a rifle for shooting. Or dialogue screens where you pick the type of answer you want and then the game serves you some dialogue.
You have your intent, provide input, then the game translates that into an action by filtering it through current circumstances.

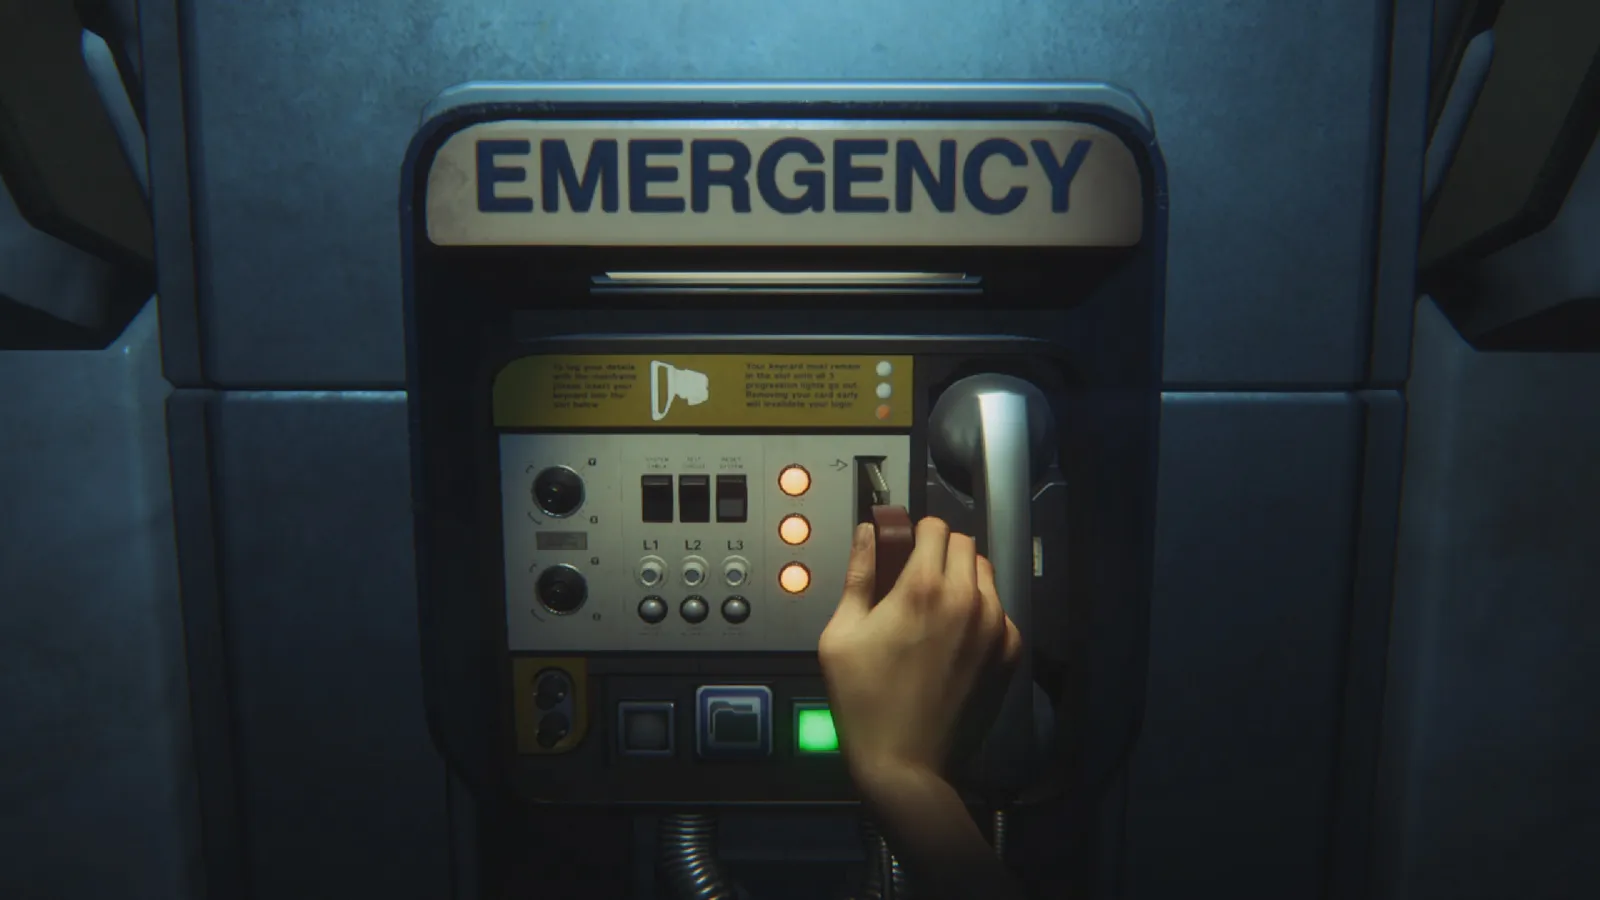
Contextual Action
Another variant is context-sensitive action. This is an action that’s contextually restricted when to trigger and therefore requires feedback to signal its availability. Walking up to a ladder and having an icon appear that says “Press X to Climb” is an example of this. The context-sensitive action itself can be direct or intent-based, depending on the game.
The key difference from other actions is that you must provide feedback to tell the player when or where the action can be performed, even if this may be signalled using graphics instead of user interface. Like my hated enemy, the dabs of paint that tell you where to climb. They are showing the player where they can use the contextual action “climb,” and they do so in the most obtuse and immersive-breaking way possible. I mean, who has to paint all those guides to begin with? That person is apparently a more competent hero than you!

Content-Based Action
The final type of action is the content-based action. An action where you press the button, the action starts a piece of content and that content dictates the result. Usually by having the content start, provide some kind of callback, and then end, with feedback provided at each step along the way or the content as a kind of progress indicator. Think of the typical first-person reload animation–that’s what we’re talking about.
Standard content is animation. Whether this is an elaborate animation on your gun, or a first-person animation of your character doing something, the biggest issue with content-based actions is that they are arbitrary in length. One way to hinder this is to predefine a set length for such actions. This can be a length in frames that the animators are allowed to add, or it can be a length in seconds. With time, the player will learn this length and can adapt their play style accordingly.
I’m not a fan of content-based actions and would therefore avoid using them, or at least allow players to abort them naturally.
Conclusions
There are some things you can take with you about controls. Let’s just list them in bullet point form.
- You should decouple input from actions. This makes it easier to customize, and also makes it possible to use Command pattern or other patterns.
- Input can be divided into interface, state, and processing–in that order. This allows you to construct your input information in a modular fashion.
- Actions can be either generic, meaning they work with any entity in the game, or specific, meaning that they need data or functionality that ties it directly to only a certain type of entity.
- Actions can apply further restrictions based on game context, which is something actions are aware of in the game simulation that input will never be aware of. This includes things like aim assist and the concept of Coyote Time.
- Actions make use of data. You should consider how you structure this data for easy tweaking in the future. One suggested approach is to handle Baseline, Attributes, Modifiers, and Functions as separate pieces of data and construct a way to decoulple them from the entities they are owned by.
- Actions and their data lead to metrics, which is central information for content production and will have to be set in stone before you ramp up your content production.
There you go. Now go out there and tweak things. Or continue reading about 3Cs: Character. The last part in this series.

6 thoughts on “First-Person 3Cs: Controls”